Step 1:
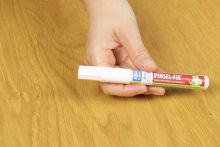
Use the AQUA Brush Pen Clear Lacquer for a selective sealing and gloss sheen adjustment of repaired areas as well as for removing fine scratches and abrasions. Shake pen for about 15 seconds. Rattle of mixing balls must be clearly heard. Before using the pen for the first time, rinse out brush tip under running water and dry it with the cotton cloth.
Use the AQUA Brush Pen Clear Lacquer for a selective sealing and gloss sheen adjustment of repaired areas as well as for removing fine scratches and abrasions. Shake pen for about 15 seconds. Rattle of mixing balls must be clearly heard. Before using the pen for the first time, rinse out brush tip under running water and dry it with the cotton cloth.

Step 2:
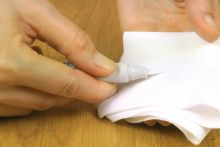
Take off cap. Before each use, hold pen with tip pointing upwards in a cloth and squeeze area marked “P/PRESS”. The pen is de-aerated.
Take off cap. Before each use, hold pen with tip pointing upwards in a cloth and squeeze area marked “P/PRESS”. The pen is de-aerated.

Step 3:
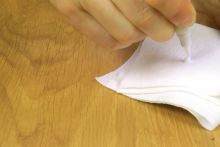
Hold pen with tip pointing downwards over the cotton cloth and again squeeze area marked “P/PRESS”. Lacquer flows into the brush tip. Slightly dab brush tip on the cloth to avoid a sealing that is too wet.
Hold pen with tip pointing downwards over the cotton cloth and again squeeze area marked “P/PRESS”. Lacquer flows into the brush tip. Slightly dab brush tip on the cloth to avoid a sealing that is too wet.

Step 4:
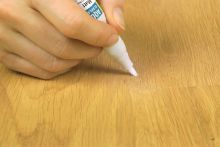
Apply the lacquer evenly in one direction to the repaired area. If possible, do not apply lacquer to the surroundings. If lacquer flow decreases, again squeeze area marked “P/PRESS” and slightly dab brush tip on the cotton cloth. After use, wash out brush tip with water and dab dry on a cloth. Firmly replace cap to prevent brush tip from drying up.
Apply the lacquer evenly in one direction to the repaired area. If possible, do not apply lacquer to the surroundings. If lacquer flow decreases, again squeeze area marked “P/PRESS” and slightly dab brush tip on the cotton cloth. After use, wash out brush tip with water and dab dry on a cloth. Firmly replace cap to prevent brush tip from drying up.
